
Cocktail preparation techniques: 5 approaches; discover which flavours work together and how much water ice adds
Making a cocktail is not an easy task, especially if you want to do it properly.
There are details you need to keep firmly in mind, because some flavours can be combined while others simply should not. It is not just a matter of mixing drinks, but also of assessing the right temperature and the amount of water contributed by the ice.
The preparation of cocktails and mixed drinks requires precise rules and proportions.
For any true connoisseur, accurate dosing of the ingredients is essential in order to achieve a full, harmonious drink. You need a broad range of raw materials with which to prepare cocktails and mixed drinks: on one side, brandy, rum, gin, vermouth, etc.; and on the other, Angostura bitters, orange and lemon peels, sugar in its different forms, fruit juices, sauces and decorative accessories.
Many authors work with their own list of cocktail-making processes. Taking their analysis into account, we suggest the following:
- Built cocktails (direct method)
- Effervescence
- Flaming (flambé)
- Blended drinks
- Macerated drinks
- Stirred drinks
- Shaken drinks
- Mixology
1. Built cocktails or the direct method:
Building, layering and floating. This is the technical expression for the simple task of pouring all the ingredients, one by one, over the ice in the glass. You can then shake them for a few seconds. You can also use “ingredient-density techniques” such as gradient layering, soft blending and the pousse-café.
- Gradient layering, where the densest ingredient is added at the start of the preparation and the rest are then added according to their density, using a long spoon to help. In this type of preparation, a variety of ingredients can be used, not just liqueurs as in the case of the pousse-café.
- Soft blending, where a homogeneous mixture is made first and then a denser ingredient is added so that it runs down to the bottom of the glass.
- Pousse-café requires greater concentration, precision and a steady hand, as there should be a clean separation between each layer. This type of drink is generally made only with liqueurs.
Among direct-method cocktails we find: Electric Lemonade, Screwdriver, Cuba Libre, Piel de Iguana, Night Tour, Speed with Vodka…
2. Effervescent cocktails:
This is a chemical process consisting of the reaction of an acid with a carbonate or sodium bicarbonate, releasing carbon dioxide through a liquid. It can be seen in carbonated drinks, where the gas that escapes from the liquid is carbon dioxide.
How do you make carbonated fruit or effervescent fruit?
There are different methods for making carbonated fruit or effervescent fruit, sometimes also called champagne-style fruit. One of them uses dry ice (CO2 in solid form). The natural state of CO2 is gaseous, and it has a sublimation temperature (the change from a gaseous state to a solid state) of -78.5º C at one atmosphere of pressure.
This ice was discovered in 1835 by the French chemist Charles Thilorier, and is used to preserve perishable foods, to make carbonated drinks, and to generate a cold vapour or mist when presenting dishes.
It is best to use fruits with a high water content and with their skin on, because when the fruit is placed in a pressurised CO2 atmosphere, the gas passes through the skin and dissolves into the fruit’s water.
For a container of around 47 litres, half a kilo of dry ice is enough.
Place the dry ice inside and cover it with a cloth. Then add the fruit; it does not need to sit on top of, or come into direct contact with, the dry ice.
Close the container and wrap it in cling film to prevent any leaks (hence the option of using a pressure cooker; as it is smaller, it also requires less dry ice), then leave it refrigerated for 12 hours.
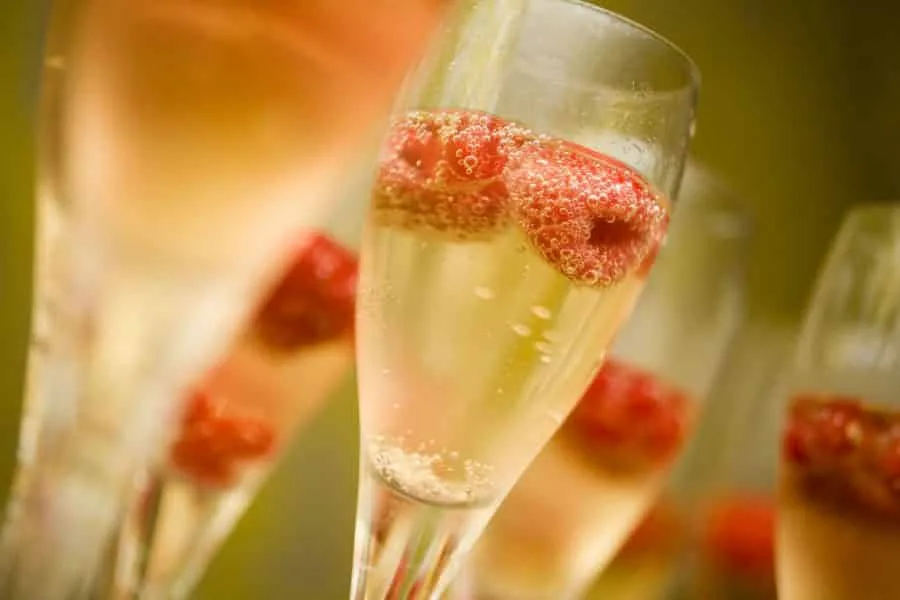
And that is it: the sparkling fruit is ready to surprise anyone who tries it. Examples: sparkling blueberry cocktail, Kentucky Coffee, Mary Pickford, Alleluia, Black Jack with aguardiente, Zombie Green…
3. Flambéed cocktails (Flambé):
Flaming drinks is a technique that has been around for a long time. It is used for cocktails and other mixed drinks that contain a small measure of highly alcoholic, flammable spirit, with an alcohol content of no less than 40%, which is ignited before serving. To carry out the flaming technique, follow these steps:
- Warm the cocktail glass slightly so that the change in temperature does not cause it to shatter. Filling it with hot water and then emptying it is enough.
- Make sure the glass is resistant to the heat produced by the flame.
- Prepare the cocktail.
- Pour the flammable liqueur or spirit into a long spoon.
- Light the flammable alcohol that has been poured into the spoon (using a long lighter is recommended).
- Very carefully pour the flaming spirit —still in the spoon— over the cocktail.
- Serve the cocktail quickly, before the burning alcohol is consumed.
- Put out the flame before drinking, although it can also be drunk through a straw without extinguishing it; in that case, it must be drunk very quickly so the straw does not melt.
- There is no need to worry about the cocktail being hot, as the flame burns off the alcohol in the ingredient on top, but it will not heat the whole cocktail.
Examples of flaming cocktails: B-52, Blue Blazer, Cookie Monster, Cucaracha, Bailey’s Comet, Ultimate Warrior, Flaming Lamborghini, Ráfaga or Satanás.
4. Blended cocktails:
An electric blender makes it possible to combine ingredients that are not so easy to mix, so it is essential when you want a smooth, even blend of liqueur and fruit.
This is the method used to create frozen drinks.
The clearest distinction lies in whether they are served dry or lengthened (with water or another liquid), giving rise to soft drinks or long drinks. Examples: Laguna Azul, Frozen Margarita, Banana Foster Smoothie, Mango Lassi, Duo Amoroso…
5. Macerated cocktails:
This is now one of the classic techniques.
So much so that it is very common to hear bartenders say that quality bars work with their own macerations, as this is one way to give cocktails a distinctive identity. “Macerating means extracting the properties of a solid ingredient (which may be a fruit or a spice) by immersing it in a liquid, which may be an alcoholic or spirit drink, or even water,” explained bartender Peter Van Den Bossche.
It consists of crushing fruit or herbs so that they release their flavour, and it is done with a muddler.
The technique involves pressing down while slightly twisting the hand. Sometimes a little liquid is added to make the process easier, but as a general rule macerating directly in liqueur is avoided; these should be added later together with the other liquids.
A cherry can be macerated in whisky so it takes on the flavour of the alcohol; likewise, a cherry or a chilli pepper can be macerated in vodka.
The maceration time varies depending on whether a fruit, a vegetable or ginger is used.
For the latter, it is suggested to let it rest for three to four days.
The best fruits for maceration are those with a high sugar content, as they dissolve more easily and allow the alcohol to absorb more flavour, colour and texture.
Red fruits, meanwhile, should be left to rest for approximately one week.
Once maceration is complete, strain the mixture first through a fine sieve and then through a paper filter, to prevent any easily perishable raw material from remaining.
Tips for maceration:
- Use sterilised glass containers to prevent any external agent from altering the product over time.
- The containers should have an airtight seal so that aromas or unwanted agents cannot enter or escape, and they should then be stored in a cool, dark place.
- After finishing the maceration, shake the jars or containers every day and taste the contents to make sure the macerations do not go too far.
Cocktail examples: rum with pineapple, Caipirinha, Caipiroska, Mojito…
6. Stirred cocktails:
For many bartenders, whether a cocktail is shaken or stirred makes a significant difference in how it is prepared.
Stirring requires a specific type of spoon, and it is a simple technique to master.
You need natural ice (tap an ice cube with the back of the bar spoon to break it into smaller pieces; if you use a larger whole cube instead, you will need to stir for longer) and a glass suitable for stirring (a crystal mixing glass is recommended).
How do you stir a cocktail?
- Chill the glasses: the mixing glass and the serving glass, although you can use just one. This can be done in the fridge or freezer, or directly with ice and water for 5 minutes. If the glasses are at room temperature, they will be warm and the contents will dilute too quickly. With a chilled glass, however, you gain time, help keep the drink cold and slow down dilution. You can also fill the glass with vodka and place it in the freezer, as it will never fully freeze and will chill the glass or cup.
- Discard the ice water from the mixing glass. If it was vodka, to avoid wasting it, keep it in another container, also in the freezer.
- Add the cocktail ingredients to the mixing glass.
- Add enough ice to fill the glass to roughly 2/3 of its capacity.
- Hold the bar spoon between your thumb and first two fingers, with the stem of the spoon between your index and middle finger, and insert it all the way to the bottom of the glass.
- Use your wrist to rotate the spoon inside the glass. It should turn on its own between your fingers, guiding the movement with your index finger so the liquid moves. Afterwards, it is advisable to move the spoon up and down to stir thoroughly.
- Stir for around 30 seconds so the drink is properly chilled (if you use a digital thermometer, as professionals do, it will be ready at -5ºC).
- Finally, pour the spirit into the serving glass with the rest of the ingredients. First discard the ice water from that glass, stir lightly and then garnish the cocktail.
Drinks made only with spirits should be stirred rather than shaken. Cocktail examples include the Negroni, Manhattan, Martini and Rob Roy.
7. Shaken cocktails:
Unlike stirring cocktails, shaking allows the bartender’s creativity and personal style to come through more clearly. It is also more fun. To shake cocktails you need a cocktail shaker, the cocktail ingredients and ice.
Start with the ice. Larger cubes are recommended for placing in the shaker, as they lead to slower, more balanced dilution. Aerating the cocktail is what can make the difference between a good cocktail and a great one.
How do you shake cocktails?
- Chill the glass you are going to serve in by placing it in the freezer for a short while, leaving it in the fridge for longer, or filling it with ice and cold water and letting it sit for 5 minutes.
- Measure the ingredients and add them to the shaker without ice.
- Add two large ice cubes; whether you also add smaller cubes is up to you.
- Close the shaker firmly so no liquid escapes. Place the empty part of the shaker over the top of the glass at an angle and tap it against the base of the glass with the palm of your hand. Careful: if you hit it too hard, you could break it. A good test is to lift the glass and shaker while holding only the shaker. They should be joined as if they were one piece.
- Hold the glass with the shaker above your shoulder and upside down. If any liquid leaks out, you’ll need to repeat the sealing process.
- Shake vigorously, without going overboard, for at least 15 seconds to break up the ice and mix everything properly. You should hear the ice rattling inside the shaker, breaking into smaller and smaller pieces.
- To open it, you need to break the vacuum seal while keeping the shaker in your less dominant hand. First, look closely at the joint that has formed. You’ll see that on the curved side, the glass and metal meet tightly on the inside, while on the outside there is more space between them. Find the point where they begin to separate so you can open and detach the two parts.
- Tap the point where they start to come apart, without overdoing it, using your hand to finish separating them, focusing on the first visible gap.
- Once the mixing glass has been removed from the shaker, leave the ice and the mixed cocktail inside it. Meanwhile, prepare the serving glass by discarding the ice it contained, taking it out of the fridge or freezer, or from wherever it was being chilled. Pour the cocktail into the serving glass with a light strain, keeping the crushed ice from the shaker out of the drink. In another chapter we’ll learn how to pour and strain a cocktail, including what double straining is.
Shaking cocktails or any drink is the fastest and most efficient way to chill or dilute it, simply because the quicker, stronger movement of the ice inside the shaker makes the ice melt and dilute the drink more rapidly.
Drinks containing juice, egg or dairy should generally be shaken, as these are ingredients whose foam gives the cocktail a better texture, reminiscent of whipped cream or meringue on the palate.
8. Mixology for making cocktails:
Mixology is a deeper knowledge of spirits, how they are made and, above all, how products are combined: why they are mixed, how they are mixed, and how to seek out a flavour and a sensation. It is about playing with aromas and textures.
For this, you need a basic understanding of chemistry and to learn about essences, spices, fruit, vegetables and garnish work.
Further reading: Mixology: an avant-garde art for creating cocktails
You may also be interested in this video explaining several cocktail-making techniques: